This was taking from a blog that is a multi-part blog series covering the Data Cloud exercises in the Agentforce Workshop training outlined here:https://developer.salesforce.com/agentforce-workshop/data-cloud/overview
In this session we’ll be setting up Data Cloud access for our user and then Ingest Contacts using the CRM Connector. If you haven’t taken the steps to set up this Org please follow the steps on the following page: https://howtodatacloud.com/2024/12/31/how-to-get-set-up-for-the-data-cloud-exercises-in-the-agentforce-workshop/
We’ll be taking you through the following steps in this blog:
(1) Validate Data Cloud Access for the User
Step I: Validate Data Cloud Access for the User
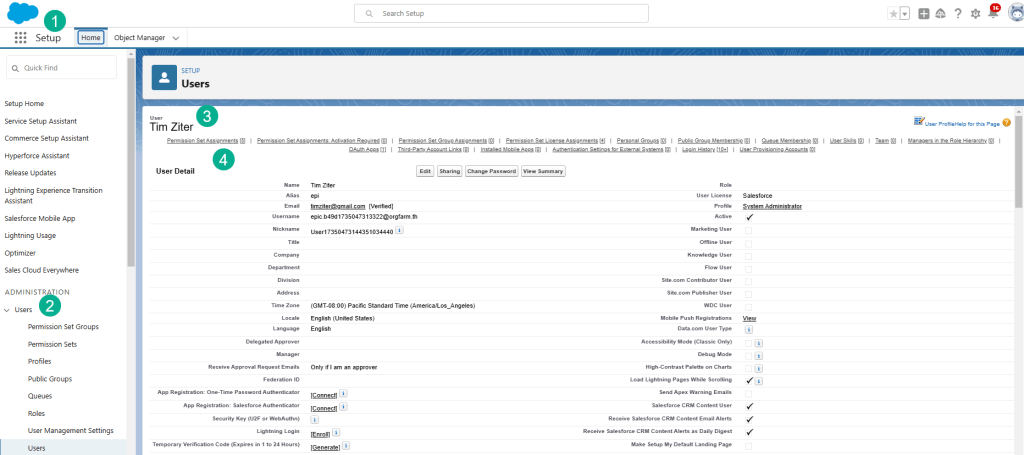
(1) In Setup in Sales Cloud.
(2) Click on Users or search for your user.
(3) Once you find the User, click into the user.
(4) And select Permission Set Assignments.
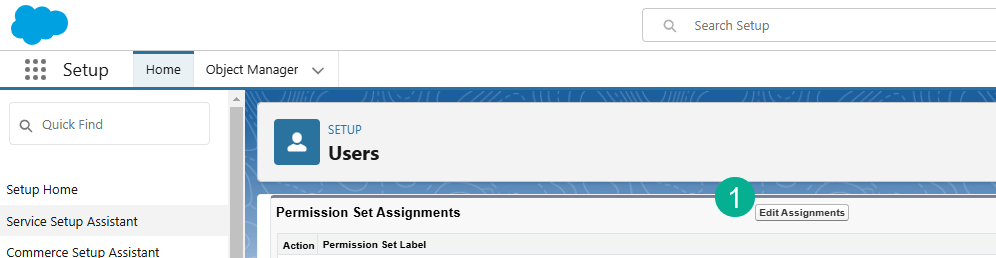
(1) click Edit Assignments.
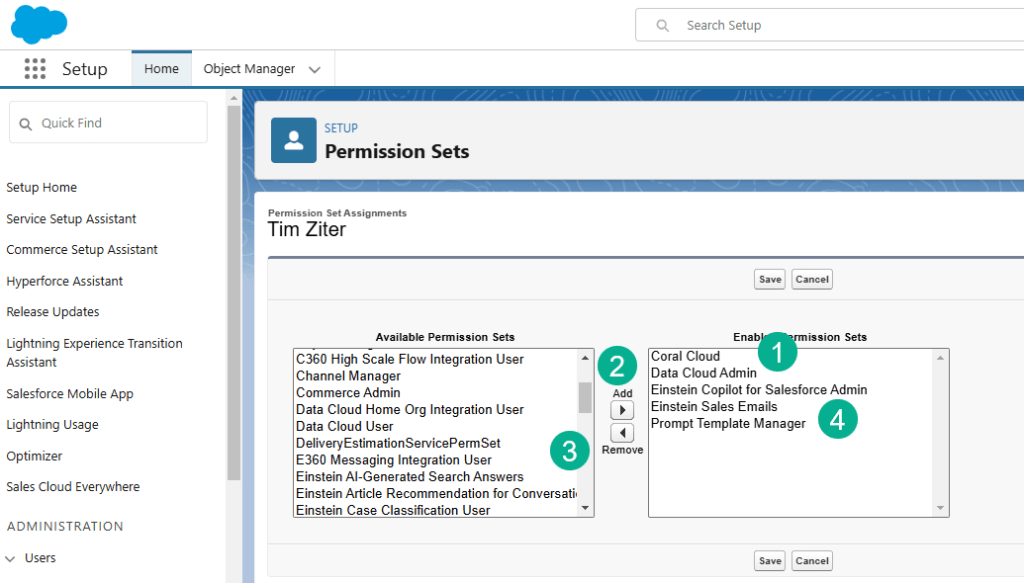
(1) Validate that you have “Data Cloud Admin” on the Enabled Permission Sets.
(2) If you don’t then you’ll want to highlight the permission set on the left and click on the Add button.
(3) The Permission Sets are displayed on the left in alphabetical order.
(4) You might also want to add the three Einstein and Prompt Template Permission Sets.
Step II: Install the Salesforce Contacts Data Kit
Open up the Setup Menu and select the Data Cloud Setup.
If the page looks like this:
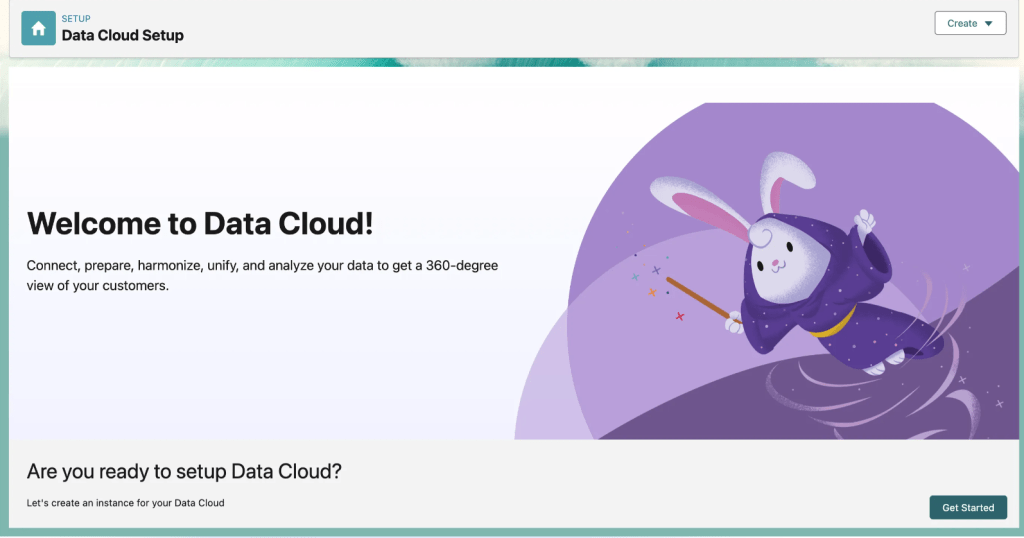
Data Cloud needs to be provisioned. Simply click on the Get Started button. This may take 15-30 minutes.

(1) Once setup your Set Up Your Data Cloud Instance will be checked and the Org Id will be displayed.
(2) You can Assign User permissions by following the steps above.
(3) Next you’ll want to connect another Salesforce org.
(4) Click the Connect an Org button.
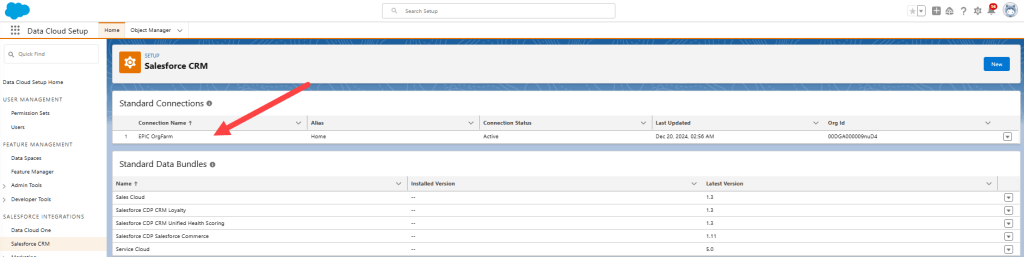
Most likely for this exercise the Sales Cloud org will be connected for you.
To install the Coral Cloud Resorts CRM Contacts Data Kit:
Replace the URL segment that comes after lightning.force.com with:
/packaging/installPackage.apexp?p0=04tHr000000ku4k
It should look like this:

Select Enter if all looks good.
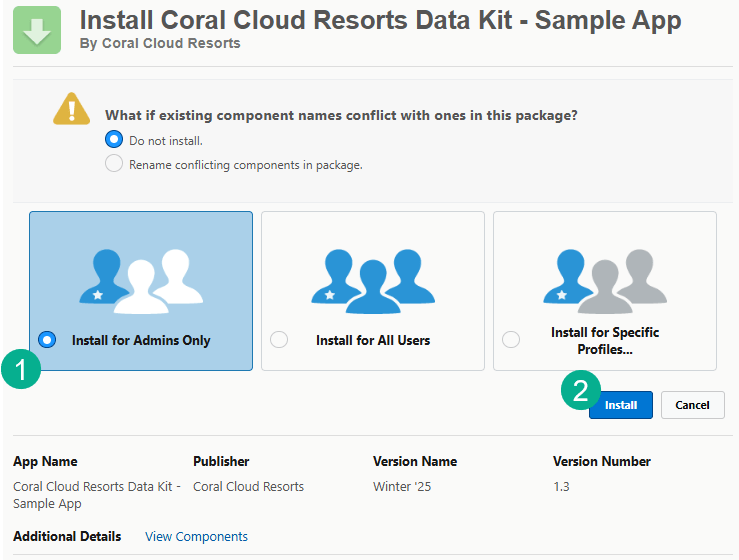
(1) It should be set for Install for Admins Only.
(2) Click Install. It should take a few minutes.
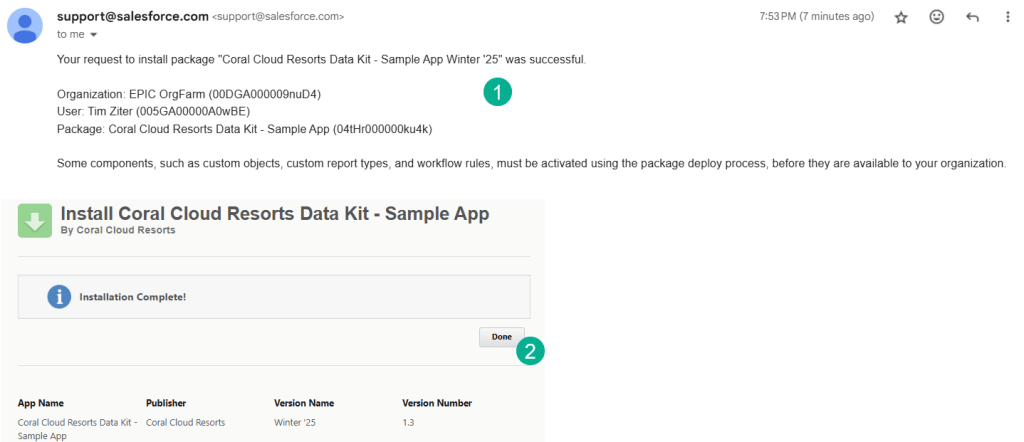
(1) You should receive a confirmation email that the install package was successful.
(2) Click Done on the Install App screen.
Step II: Create the Contact Data Stream using the Salesforce CRM Connector
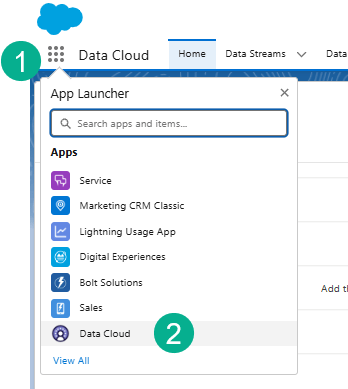
(1) In the nine dots App launcher.
(2) Select Data Cloud.

(1) In the tabs at the top click on Data Streams.
(2) Select New.
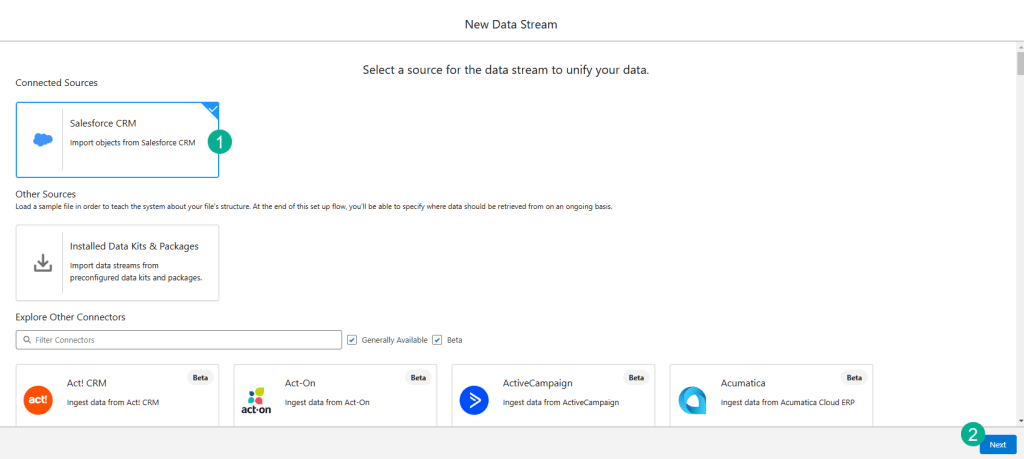
(1) Select Salesforce CRM.
(2) Select Next.

(1) Under Custom Data Bundles, select the one object available.
(2) In the window to the right you can see that the bundle contains Salesforce_Contacts.
(3) Click Next.
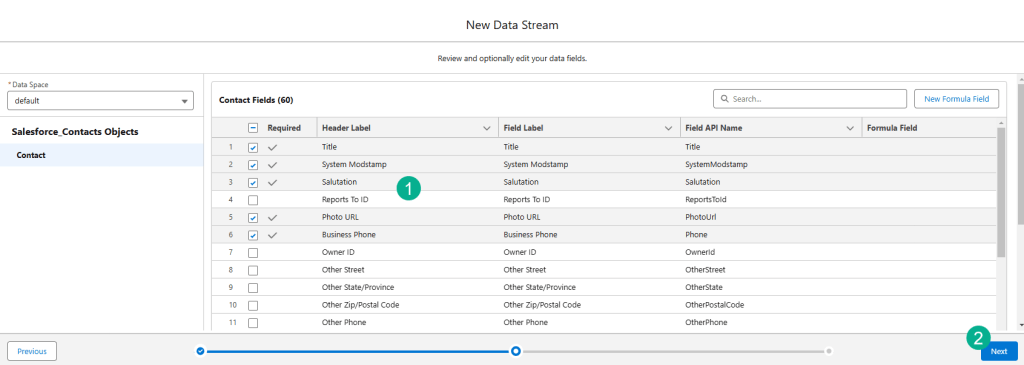
(1) Keep the default fields.
(2) Click Next.

Click Deploy.

(1) Once the Data Stream appears.
(2) Select the arrow box to the right.
(3) And select Refresh Now.

(1) Click on the Data Lake Objects tab.
(2) Click on Contact_Home.
Step III: Review the data mappings
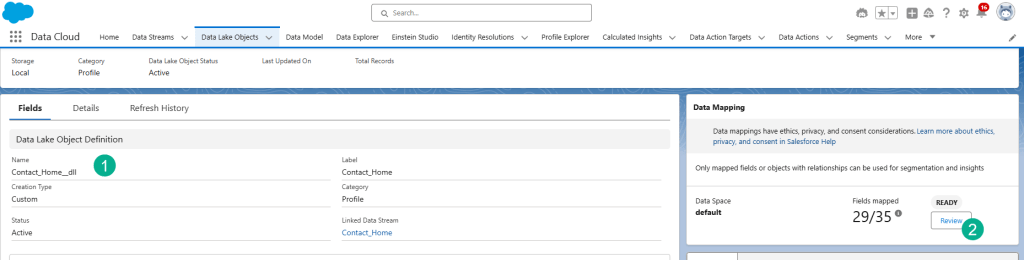
(1) In the Contact_Home DLO.
(2) Click on the Review button under Data Mapping.
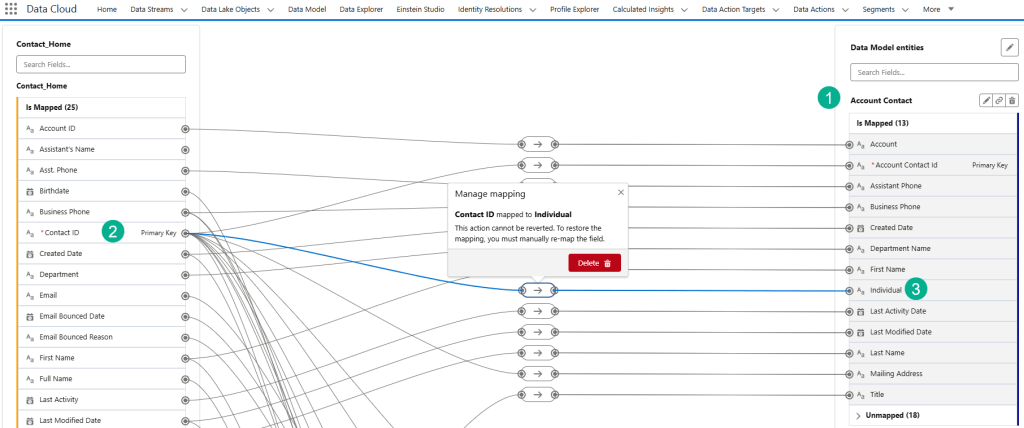
(1) The Contact_Home DLO is mapped to five Data Model Objects: Account Contact, Contact Point Address, Contact Point Email, Contact Point Phone and Individual. The last four DMOs are needed to unify the individual which we will cover in a future blog.
(2) Take the time to verify for each DMO that the Contact ID is mapped to the key field (Individual or Party Id) on each object.
(3) Contact ID is Mapped to the Individual ID on the Account Contact DMO.
And that’s it for this blog, congratulations you’ve activated Data Cloud in your trial org and have brought over and mapped contact records from Sales Cloud.
